|
|||||||
| Register | FAQ | Members List | Calendar | Today's Posts | Search |
 |
|
|
Thread Tools | Rate Thread | Display Modes |
|
|
|
#1
|
||||
|
||||
|
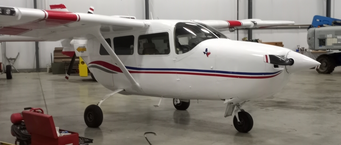
1965 C337 "Alternator not charging" light
Dr. Dave.
Thanks for the heads-up on the crimper. BUT I already bought one to try. Thank you for the offer to crimp my wires-though. I have another option there is a company there that I use to work for that does a LOT of wire crimping, aviation standard stuff. I could have them crimp them if needed! Regards, BILLS 
|
|
#2
 04-01-19, 03:14 PM
|
|||
|
|||
|
Hi:
I'm running off an avionics master breaker to a switch and then back to feed the entire avionics bus. You could run to two switches for a backup avionics switch if you want. As I recall the starter mounting stud was larger than 5/16". I will measure tonight and report back. Dave
|
|
#3
04-02-19, 09:30 AM
|
|||
|
|||
|
Dr.Dave,
Thanks for the tip on the Master Avionics Breaker and Switch...Had not thought about that. With building a new CB panel, I like the ability to isolate certain things. Yes, the studs on the starter are 3/8". I went ahead also and bought a large stock of terminals, wire and a good crimper that goes up to 4 AWG. Even though I have 30 amp alternators on my bird, I am going to upgrade the wiring from the alternators and the shunts. Since I have the aircraft completely opened up and changing throttle/prop cables on the rear engine, it is so easy to run new wires. Jeff
|
|
#4
04-04-19, 11:21 PM
|
|||
|
|||
|
Yes, just measured it at 3/8". I'd love to see a pic or your new circuit breaker panel. The shop that cut mine for me has the template in their computer. It would be no big deal to have another panel cut. I have some extra spacers if you need to shim out the panel a bit.
Dave
|
|
#5
04-04-19, 11:44 PM
|
|||
|
|||
|
Jeff:
Somehow I missed your previous post. I'd be glad to help and share what I have learned. I had the same goal as you in keeping the original front faceplate. I think it's nice to ditch the thin piece of aluminum behind the faceplate. There was a bit of corrosion between that plate and the breakers. The first step is probably the sub-panel that the breakers mount to. The only thing that makes that a pain is the little locator holes for the breakers. As I mentioned in another post the shop that did mine has the whole thing laid out in their program. I'm sure we could have them cut one out. At this point we should probably have a few of them made. After the mounting panel is done it's a matter of ordering your new breakers. I'm very pleased with the 2TC2-x Klixon breakers. The 35 amp breakers are 3TC2-35. The busbars are going to be straight forward for the three straight pieces. The jumpers will have to be hand formed. Call Charlene @ Quick Ship Metals at 888-334-2177 and order your copper materials. If you get a 6" x 12" piece you'll have plenty. Have Charlene cut your individual bars for you. She has a better shear in her shop than I have. I will have to measure my pieces again to give you the exact measurements. They will still have a bit of a twist from the shear but they straighten right out. Have her cut six individual pieces. Undoubtedly there will be some where your holes don't line up. You will be hand-drilling for each breaker. What color do you want your sub-panel piece? While you're at it make paper templates of the circuit panel enclosure. Take those templates to your local plastic place and have thin polycarbonate pieces cut to form an insulated circuit panel enclosure. If you don't have a favorite plastic place just mail them to me. I think mine cost $8. This will be a fun project, don't be scared. There are a few other tips that will help along the way. I will get you the part number for the avionics switch I like. Report back. Dave Last edited by DrDave : 04-04-19 at 11:53 PM.
|
|
#6
05-24-19, 10:09 PM
|
||||
|
||||
|
https://www.slideshare.net/mobile/St...oting-test-box
This PowerPoint presentation is helpful for people new to the 337 charging alternator system
__________________
General Sky Tree top Flying in C336, O2, 337A, P337G with IO-550's
|


 Hybrid Mode
